
The Next Trail allows you to map your own trails. Pretty simple:
- From the main screen, press the Record icon
 at the bottom of the page
 - Optionally, you can enter a Trail Name and Description. If you don’t enter one at this time, there are ways to name it and give it a description later
- Press Save to start Recording.
- The Icon will switch to a red box
 to indicate it is recording.
 - There are a couple of options you can choose in the upper left side of the screen
- Route – what you are recording is a “Route” – which is normally a road
- Trail – what you are recording is some type of trail (normally off-road)
- As you are riding along, you can denote an Intersection by pressing the
 Icon. This will stop the existing trail and immediately start another another trail segment (thus creating an intersection)
- Press the red box when you are finished recording.
You can see My Trails on the map by choosing the layers icon ![]() at the bottom of the main page and selecting Show My Trails.
at the bottom of the main page and selecting Show My Trails.
Once you have some trails created, you can view all the trail(s) information by going to the hamburger icon in the upper left of the main screen and choose My Trails.
My Trails
Here is a sample of what will be shown:
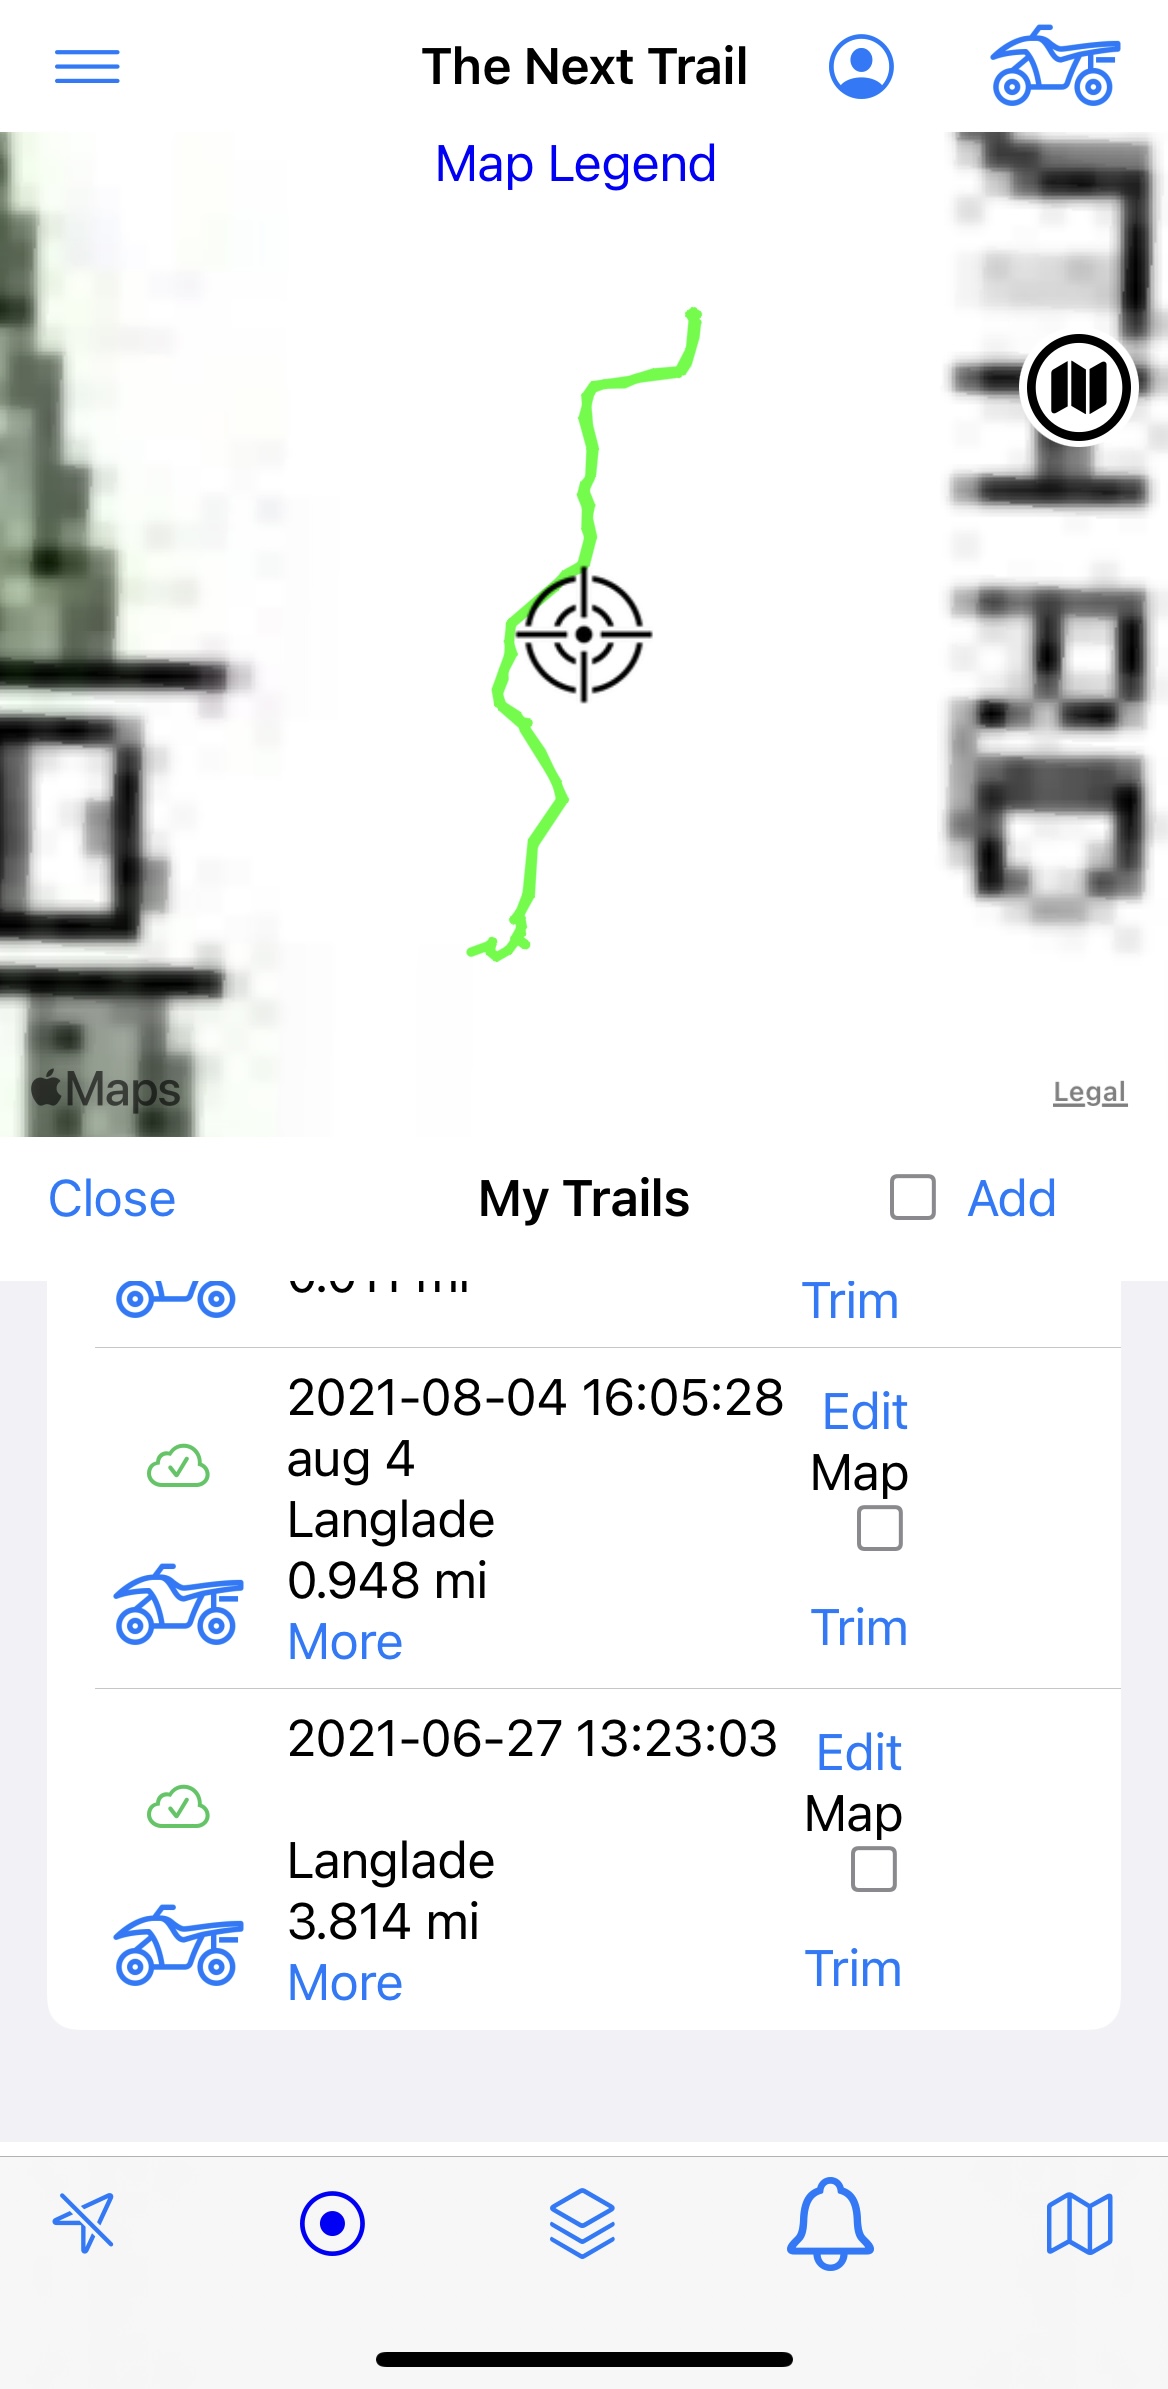
On top is a map. On the bottom is a list of trail segments you recorded. In the list of trail segments, if a trail segment has a cloud icon ![]() next to it, that means the trail segments is being archived to Cloud storage maintained by The Next Trail. These trail segments will not be shared with anyone else, they are archived to the Cloud as backup in case you have to switch phones, or delete and reinstall the app. Note: you can turn on/off this Archive function under Preferences.
next to it, that means the trail segments is being archived to Cloud storage maintained by The Next Trail. These trail segments will not be shared with anyone else, they are archived to the Cloud as backup in case you have to switch phones, or delete and reinstall the app. Note: you can turn on/off this Archive function under Preferences.
If you tap on one of the trail segments in the list, the map will move to show you the trail segment on the map. On the list you can press:
- Edit – which will allow you to update information about the trail segment (e.g. Name, Description, Activity, etc.)
- Map – this check box indicates that you want this trail segment to show up when you Show My Trails. Note, you can check the Map check box at the top of the list to check or uncheck all of the check boxes below.
- Trim – this is an advanced function and not normally used. It is used to delete points of the trail segment (for example, maybe you recorded longer than you wanted to). Note: to trim, you may have to zoom in a bit to see the Red Dots that make up a trail segment. You will then move the bullseye over one of the Red Dots. Here is what each of the options does:
- <Trim – delete current Red Dot and move to the next dot to the left
- >Trim – delete current Red Dot and move to the next dot to the right
- Undo Trim – Undo all of the trims completed so far – trail segment goes back to original state
- Cancel – stop trimming and do not save changes
- Save – stop trimming and save changes
Here is a quick tutorial on creating your own trails…